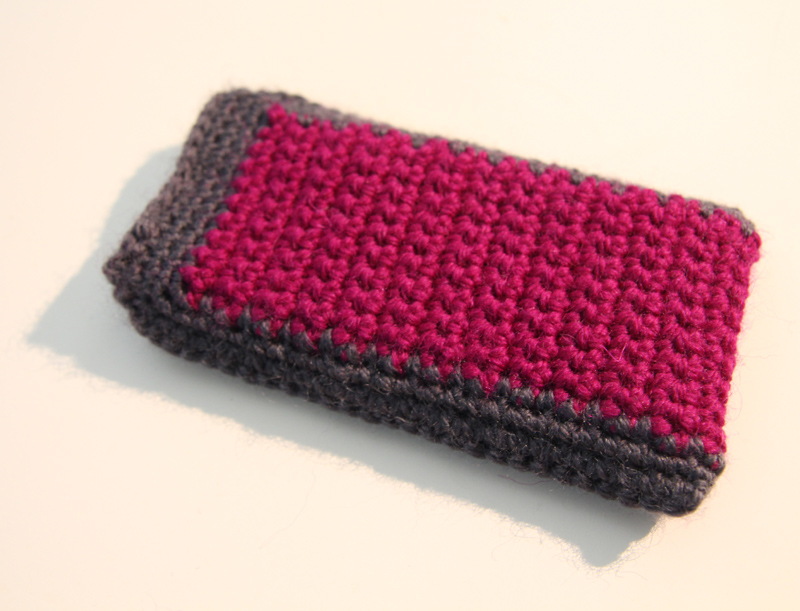
I wanted to make a mobile phone pouch to protect my phone while it bounces around in my bag. As usual, I searched online for patterns however many of then used buttons to close the pouch. I’m wary of buttons because something in my bag bumping the hard button could push it against the phone and crack the screen. So I made up my own mobile phone cover that didn’t need a button.
This was a prototype and I wasn’t sure how it would turn out so I didn’t jot down the specifics of what I did, but in general:
I used a 4.00mm (US: size G) hook and two types of 8ply wool.
I began with the main colour, chaining 10 and SC in rows back and forth to make a length of fabric that almost covers the phone from the top of the front to the top of the back when I wrapped it around the mobile phone. I weaved in the end to complete the fabric.
I then chose a second colour for the border, and I SCed around the fabric piece twice, again testing the piece around my phone to see if the fabric was large enough to wrap up the phone. In the first round I tried to create the SCs in any of the visible gaps in the sides of the fabric, the second round was easier because I had real stitches to SC in to. I had been careful to start this border at a corner of the fabric so that when I finished the second round I could SC join the two edges together.
I then hit a problem (apologies, this description will be hard to follow) – I had to start a new piece of yarn to join the other edge but I realised that it would not match the stitch direction from the first edge (see image below to see how the “v” of the seams turned out). I tried to figure out how I could crochet left-handed (I’m right-handed) because I thought that could make the pattern go in the same direction on both edges, but after a few messy attempts I gave up. I decided to just crochet it as normal, making sure I crocheted on the right side of the fabric so that the style of the stitches match on the back and front of the piece even if the direction of the stitches go in opposite directions.
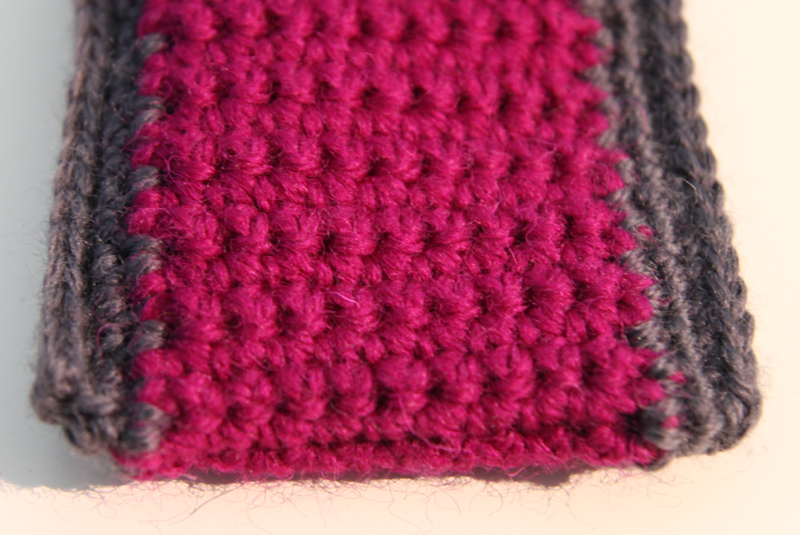
The “v” of the right seam is right way up.
The mouth of the pouch was a little too loose so I continued with a few SC rows around the mouth, on the second of which I did four sc2tog decreases (one each in the middles and sides of the fabric so they were equally spaced). I was still worried the phone might slip out too easily, so I did slip-stitched around to finish it off which ended up making the mouth a bit too tight! Oops. But I can now shake the pouch with the phone inside and the phone does not slip out. The phone needs a little wiggle to get in to the pouch, but with a little wear I expect the mouth will stretch enough that the phone is easier to slip in.