 After a few more sales over at my Etsy store, I decided it was time to invest in fabric labels that I can attach to some of my creations.
I’m in two minds about labels because I personally am not a fan of brands being splashed large. I know though that others like labels so I’m happy to give them a go in a style I’m comfortable with and I wanted to share the steps I took.
Find out what the suppliers can and can’t do
While I know that there are ways to print these myself, I would prefer to let someone else look after it who’s done it many times before. I looked around online for Australian label suppliers and Etsy-sellers, read up on their design needs, materials, sizes, and printing methods.
I decided that my main criteria was that I wanted labels that:
- could be folded as a tab to put on the outside seam of my zip pouches
- don’t fray
- can be machine washed, and
- are small enough that they doesn’t distract from the item but reminds people where it was purchased from
Sketch
I picked up a pen and a blank page to sketch various combinations of my shop logo on to paper, cutting it out, folding it this way and that, and holding it up against my zip pouches to see how it looked.
This helped me to decide on the dimensions for the labels and the elements that I wanted to show on the label. It also helped me realise that I needed a seam allowance on the ends of the label and which direction the logo and text should face (e.g. I want the base of the crown logo, being a straight line, to line up with the seam).
Digital design
I worked on the computer to create a template based on the information I’d read from the suppliers, setting up a layout grid and placing my logo and text.
I then copied the template and made a few variations so that I could compare different looks to ensure I wasn’t just locking in to my first idea in case there were better ones to explore. Many adjustments followed!
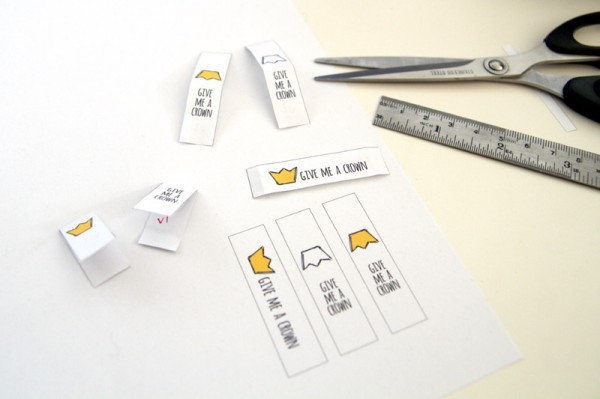
Paper prototype
I printed my designs at full size, cut them out, and played with them, holding them up to zip pouches, pondering, and bending them this way and that.
I contacted the supplier who looked most promising and asked them a few questions about their printing process and the file format they would need. Although I knew I would be revising it, I attached this draft design asking if it rang any alarm bells for them. They wrote back soon with the answers to my questions and praising my draft!
Revise
Confident with the supplier I’d use, I knew that they allowed three different label designs in a single order so I created another version that could be sewn on the inside of pouches, bags or clothing.
Working at such a small scale means that being out by a few millimetres can cause difficulties with sewing, or make the graphic look unbalanced, so I did some pixel-pushing and a lot of measuring to fix up a few areas I hadn’t been happy with in the prototype.
I scribbled a version number on the back of my first prototypes, printed the revisions and played with those, and then did another round of revisions and printed again.
Finally I was happy!
And I sent my file off to the label maker… and now I wait eagerly at the mail box :)
Edit 7 September 2014: See and read about how the fabric labels turned out!