I’ve been meaning to learn how to knit a top and, with summer coming on, I’ve been looking at beautiful cotton and linen sleeveless tops posted to Ravelry. I’ve been daunted by the idea of using up a lot of beautiful yarn and ending up with something wonky and shonky but it was high time to give it a go.
Despite the warming weather, I decided to use Morris and Sons Estate 4 ply wool – I bought a few balls of this yarn to test their qualities for knitting socks but I hadn’t got around to it yet and I knew that I could pick up more yarn from the local shop if I needed it. Wool is also the yarn I’m most confident with so it seemed like a good choice for a test project.
I searched for a basic top pattern that could be knit in the round but I kept only finding straight needle two-piece patterns. What’s a girl to do then but make up her own pattern?
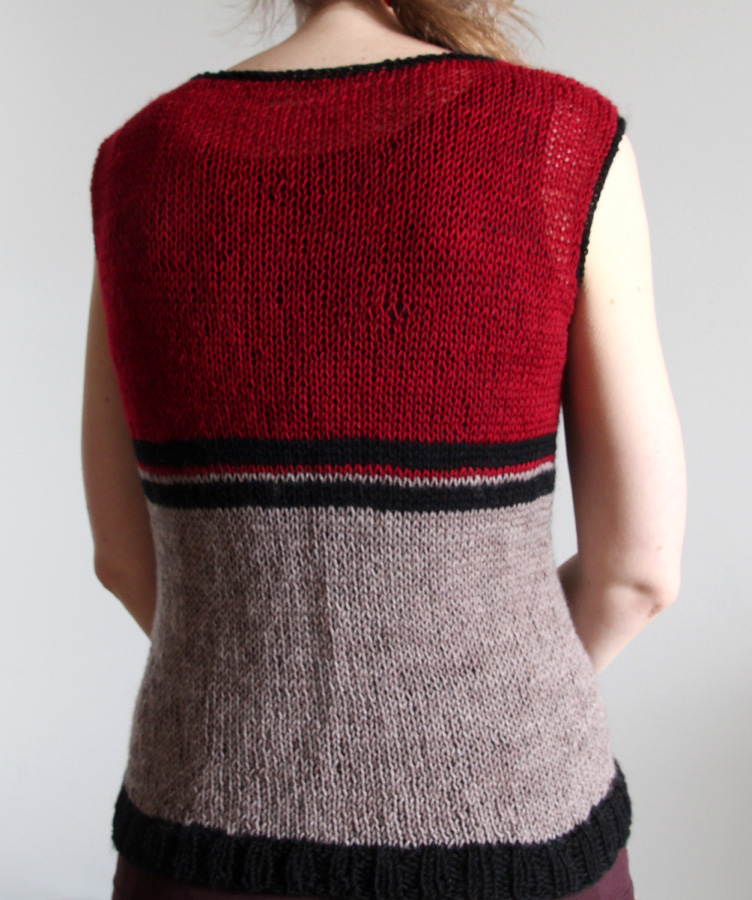
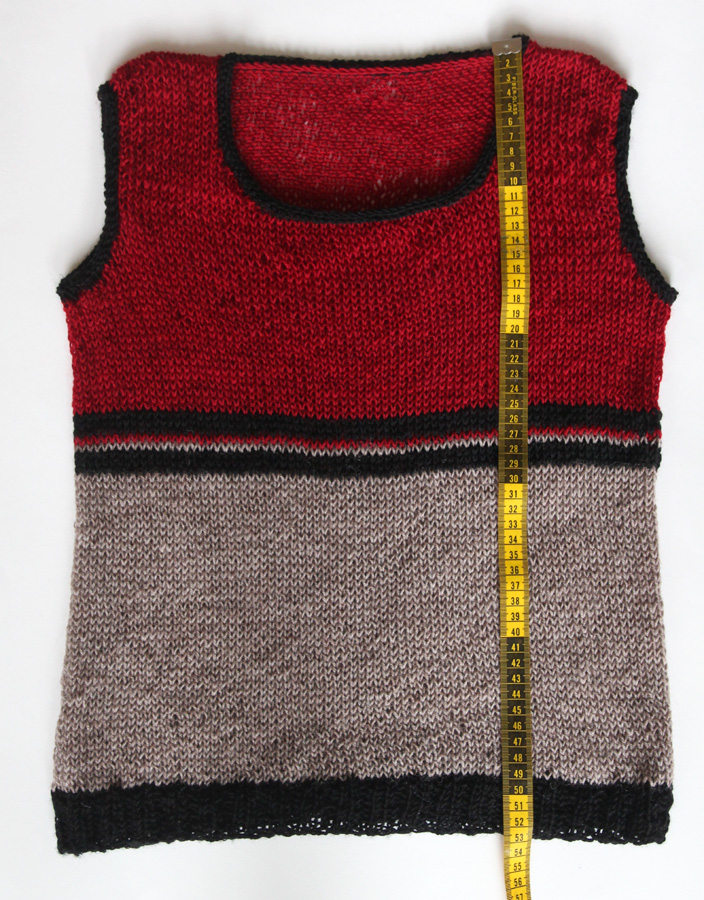
I wanted a loose knit fabric so I did a swatch to check the gauge, calculated my hip circumference, and added a few centimetres for ease. I cast on to 6mm circular needles, rib first, then stockinette stitch around and around and around.
My love of stripes popped in halfway and then I switched over to straight needles to begin the armholes (reading a few patterns for inspiration to see how many decreases they did) and then the arm straps, knitting them to the back piece with a three-needle bind-off.
I then tried to figure out how to add an edge to the armholes and neckline. They were tricky because of the loose stitch I’d chosen but Knitty.com’s Techniques with Theresa provided enough hints to help me along. I realised of course that, instead of using my normal method for decreases, I should have looked in to decreases best suited for tops and joins, but I managed all the same.
No sewn seams! That surprised and delighted me :) I had many yarn ends to weave in but I didn’t need to tackle any long sewn seams.
The stretch factor
One of the fears I had was that I didn’t know how much the top would stretch when it was put to use – would it reach my knees?! I erred on the side of caution keeping it navel-length expecting it would stretch at least a few centimetres. After the wash, it fits well! It hasn’t warped in any ridiculous way and it gained a reasonable 5cm (2 inches) in length.

As a first attempt I’m happy. Apart from time spent looking for a few techniques, the knitting was quick because a large part of it was simple plain knit stitches in the round.
The top weighs just 97 grams so it doesn’t need a billion balls of wool, and I’m hoping there are a few more chilly days this spring so I can wear it over a long-sleeved top.
I’ve written up my own pattern and I’m going to replicate it with other yarn to test and adjust and hopefully I can put it on this site later in the year. Overall it’s a very easy construction and fun for a first top experiment.